From Concept to Keys: How to Turn Your Dream Home into Reality in Nepal
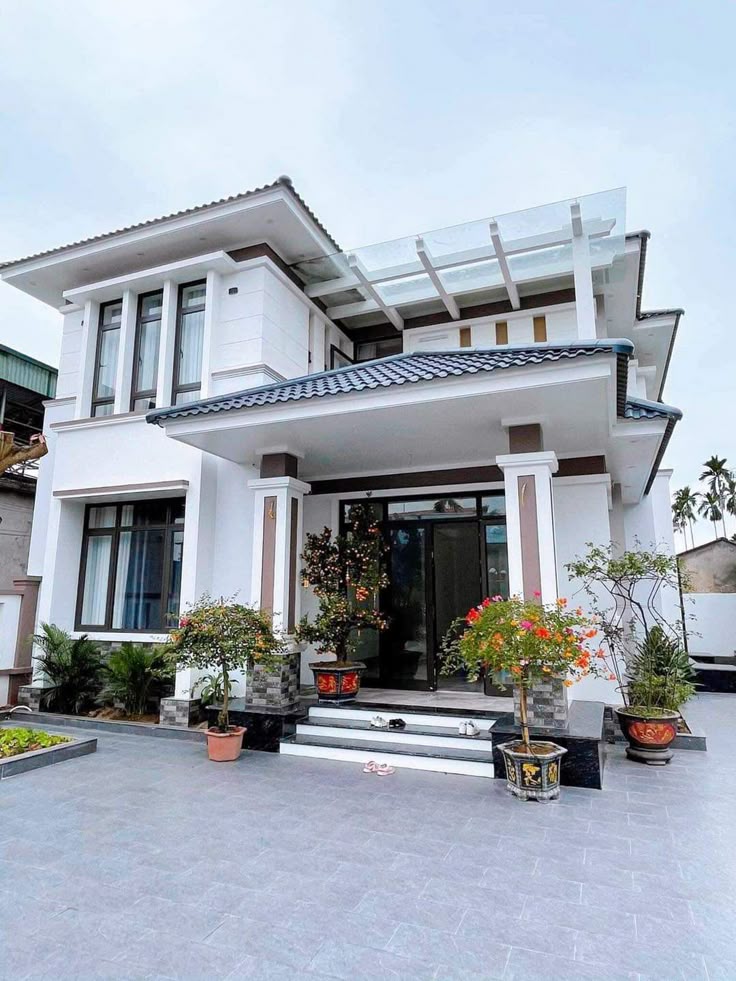
Close your eyes and imagine it. A sunlit kitchen. A cozy rooftop terrace. Rooms filled with your personality. Maybe even a small garden or puja space. It’s not just a house—it’s your dream home.
Now, open your eyes and face reality: building a home in Nepal can feel overwhelming. From land purchase to design to construction, the process is full of choices, challenges, and potential pitfalls.
But here’s the good news: with the right guidance and local know-how, your dream home isn’t just possible—it’s achievable. Let’s walk through how to go from concept to keys in Nepal, one smart step at a time.
Step 1: Define Your Vision
What Does “Home” Mean to You?
Before you think about walls or roofs, ask yourself what you really want. Is it a modern minimalist house in Lalitpur? A traditional-style family home in Bhaktapur? A compact 2BHK in the heart of Kathmandu?
Consider:
-
How many people will live in the home?
-
What kind of layout suits your lifestyle?
-
Do you need future expansion options?
-
What’s your budget range?
Putting your ideas on paper, even in rough sketches or bullet points, gives you a clear starting point. It also helps your architect or builder understand your dream right from the start.
Step 2: Choose the Right Plot
Location, Location—and Legality
Finding the right piece of land is key. In Nepal, things like road access, utility connections, soil strength, and local bylaws can dramatically affect your home design—and budget.
Tips to keep in mind:
-
Check the land ownership documents thoroughly (Lal Purja).
-
Make sure it’s registered properly and has clear boundaries.
-
Avoid buying land with ongoing disputes or unclear usage rights.
-
Get help from a legal advisor or a trusted real estate agent.
And remember: sometimes a slightly smaller or less-central location with solid infrastructure is a better long-term investment than a flashy, problematic plot.
Step 3: Pick the Right Professionals
A Great Team Builds Great Homes
Once your vision and land are in place, it’s time to assemble your team. Here’s who you’ll typically need:
-
Architect: Turns your vision into blueprints and ensures space is used wisely.
-
Structural Engineer: Makes sure your home is safe, especially in a seismically active country like Nepal.
-
Contractor/Builder: The one who actually brings your home to life.
Hiring a local construction company is a huge plus. They’ll understand Nepali codes, weather patterns, labor dynamics, and permit processes better than an out-of-town or foreign firm. Local firms can also help you save time and money by sourcing nearby materials and skilled workers.
Step 4: Design Smart (and Legal)
Function + Style + Compliance
A good home design balances your needs, your style, and Nepal’s building laws. For example, the Kathmandu Metropolitan City requires certain setbacks from roads and neighboring plots. You also need approval for building permits, structural safety, and sanitation systems.
Work with your architect to ensure:
-
The design meets National Building Code requirements.
-
The layout makes the most of sunlight and ventilation.
-
Water tank placement, solar panels, and parking are planned early.
Also, earthquake resistance isn’t optional—it’s essential. Your structure should include proper RCC frame systems or other reinforcements to protect your family.
Step 5: Set Your Budget (Then Add a Buffer)
Be Realistic About Costs
Building a home in Nepal can cost anywhere between Rs. 3,000 to Rs. 5,000 per sq. ft., depending on location, materials, and design complexity.
Include in your budget:
-
Land development (leveling, boundary walls)
-
Design and engineering fees
-
Government approvals and taxes
-
Construction materials and labor
-
Interior finishing (tiles, paint, woodwork)
-
Unexpected costs (because there will be some)
Pro tip: Always keep a 10–15% buffer for surprises. It could be anything from a price hike in cement to unexpected soil issues during foundation work.
Step 6: Get Permits and Start the Build
Paperwork Before Bricks
Before construction begins, you’ll need official approval. This usually includes:
-
Architectural drawings approval
-
Structural safety approval
-
Municipality or ward office permits
-
Environmental and sanitation clearance (if needed)
This step can take a few weeks, depending on your municipality. Working with a reputable local construction firm can speed up this process, as they often know who to talk to and what documents are required.
Step 7: Monitor the Build, Stage by Stage
Foundations to Finishings
Construction is usually broken down into several stages:
-
Excavation and Foundation
-
Structural Framework (RCC, columns, beams)
-
Wall Construction & Roofing
-
Plastering and Flooring
-
Electrical, Plumbing, and Sanitation Work
-
Painting, Fixtures, and Final Touches
Each stage requires inspection and approval before moving forward. If you’re not able to be on-site daily, ask your builder for regular photo/video updates or use live CCTV monitoring if available.
Some companies even offer digital progress reports, making it easier to stay in the loop without being physically present.
Step 8: Interiors & Personal Touches
Where the Magic Happens
This is where your house starts to feel like a home. From the kitchen design to wall colors, from bathroom tiles to lighting fixtures—your style shines here.
Keep these tips in mind:
-
Prioritize natural lighting and energy efficiency.
-
Choose materials that are durable and low maintenance.
-
Don’t overcrowd—leave breathing space in every room.
-
Invest in good plumbing and electrical fittings. You don’t want to redo them later.
And if you’re unsure about choices, ask your contractor for sample mockups or 3D walkthroughs.
Step 9: Final Inspection and Handover
Crossing the Finish Line
Once construction is done, it’s time for:
-
A final site inspection (check for cracks, leaks, and unfinished work)
-
Testing electrical and plumbing systems
-
Ensuring all design specs were followed
-
Receiving warranty documents and final bills
Only after all checks are done should you sign off on the handover. You might also want to organize a puja ceremony or housewarming, depending on your cultural practices.
Step 10: Move In and Celebrate
Welcome Home!
You did it. From rough sketches to real bricks, you brought your dream home to life. Moving in isn’t just about shifting furniture—it’s about starting a new chapter.
Take a moment to appreciate the journey. It wasn’t always easy, but it was worth it. You’ve created a space that’s yours in every sense.
Bonus Tips for First-Time Home Builders in Nepal
-
Talk to your neighbors: Learn from their experiences with contractors or designs.
-
Track expenses in a spreadsheet: This helps you stay on budget and spot cost overruns early.
-
Store leftover materials: Extra tiles or paint can come in handy for repairs later.
-
Go green: Install a rainwater harvesting system or solar panels if possible.
Final Words: Build Smart, Build Local, Build for Life
Building a home in Nepal is a big deal—emotionally, financially, and practically. But with the right planning, team, and mindset, it doesn’t have to be a stressful experience.
By working with local professionals who understand the land, laws, and logistics, you not only save money and time—you build a home that truly belongs to you and your community.
So go ahead—turn that dream sketch into keys in hand. Your perfect home in Nepal is waiting to be built.


Leave a Comment