How to Properly Clean Your Dryer Lint Trap Step-by-Step in Alameda
Let’s be honest—doing laundry isn’t anyone’s idea of a good time. But there’s one tiny task that can make a huge difference in both safety and savings: Cleaning Dryer Lint Trap. If you live in Alameda, with its salty breezes and damp air off the bay, keeping your dryer happy is extra important. I’ve learned (sometimes the hard way!) just how crucial it is to tackle this simple job, and I’m here to walk you through it, step by step, just like I’d show a neighbor or friend.
“A little lint cleared today can save a lot of headaches tomorrow.”
Why Bother with the Lint Trap?
You might not think much about that fuzzy layer building up in your dryer, but trust me, it matters more than you might expect. First, when the lint trap is clogged, your dryer can’t do its job right. Clothes take longer to dry, and your energy bill creeps up. Worse, all that trapped lint is a major fire hazard. In a place like Alameda, where homes often have old wiring and wooden frames, you don’t want to risk it.
Plus, regular cleaning keeps your dryer running smoothly for years. Think of it like brushing your teeth—skip it too long, and you’ll face bigger (and more expensive) problems down the road.
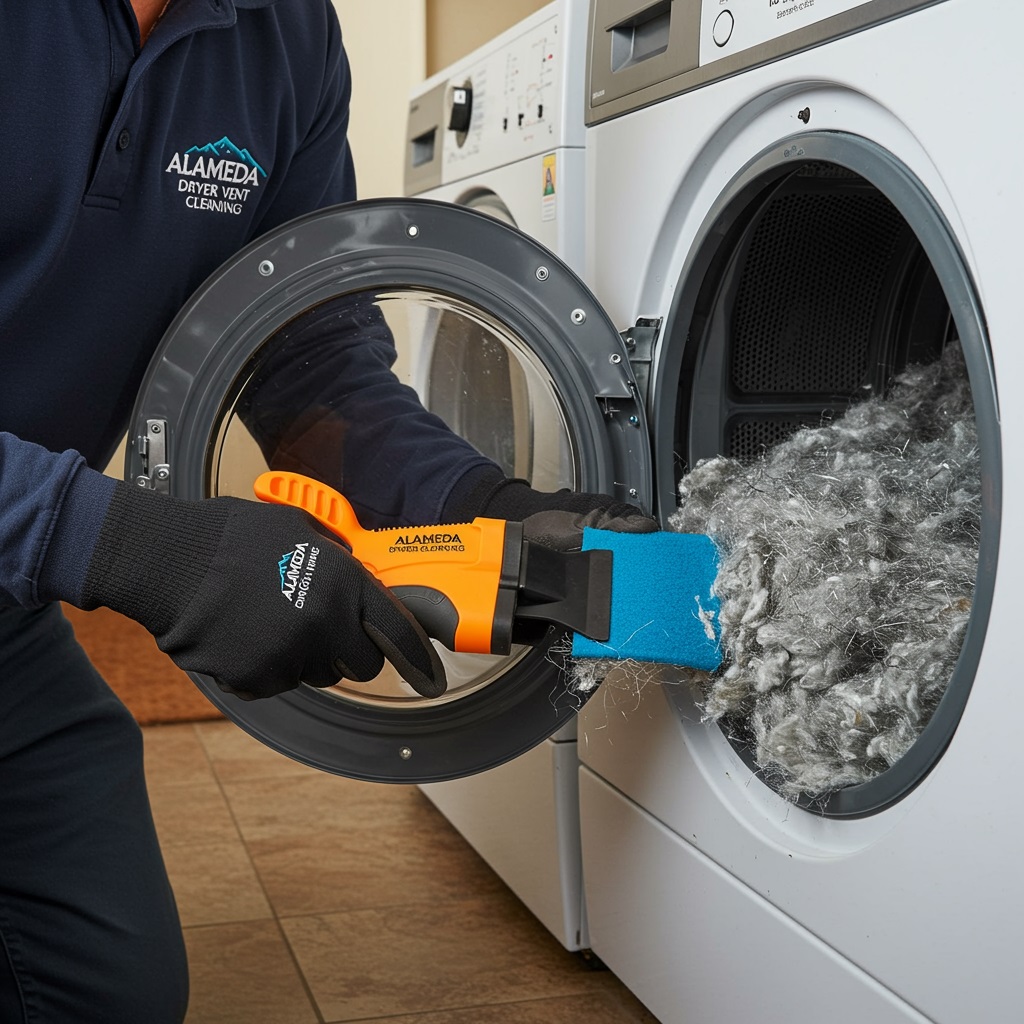
Gathering What You Need: The Dryer-Cleaning Toolkit
Before you get started with cleaning your dryer lint trap, grab a few simple things. Most of these you probably already have at home:
- Soft brush or old toothbrush
- Vacuum cleaner with a hose attachment
- Mild dish soap
- Warm water
- Clean, dry towel
For a deeper clean, a flexible dryer vent brush can be helpful, but it’s not essential for this basic routine.
Step-by-Step: Cleaning Dryer Lint Trap in Alameda
Here’s my tried-and-true method for keeping your dryer running safely and efficiently. I usually do this every couple of weeks, especially during rainy seasons when laundry piles up fast.
| Step | What to Do | Why It Matters |
|---|---|---|
| 1. Unplug the Dryer | Always start by unplugging your dryer, just to be on the safe side. | Prevents accidental shocks or starting the machine while cleaning. |
| 2. Remove the Lint Screen | Pull out the lint trap, usually right at the front or top of your dryer. | Gives you access to all the lint and dust hiding inside. |
| 3. Wipe Off the Lint | Use your fingers or a soft brush to gently lift off the layer of lint. | Removes the main blockage that slows down drying. |
| 4. Wash the Screen | Rinse with warm, soapy water and scrub with the toothbrush to clear any stuck-on debris. | Gets rid of residue from dryer sheets and fabric softener. |
| 5. Dry Thoroughly | Pat dry with a towel and let it air out before putting it back. | Prevents mold or mildew from forming. |
| 6. Vacuum the Slot | Use the vacuum hose to suck out any lint hiding in the slot where the trap sits. | Keeps lint from sneaking into the dryer’s inner workings. |
| 7. Replace the Trap and Plug In | Once everything is dry, slide the lint trap back in and plug your dryer back. | Ready for your next load—safer and more efficient! |
Beyond the Trap: Keeping the Whole Dryer Happy
Cleaning your dryer lint trap is a key part of routine maintenance, but it’s not the only area that needs attention. Every few months, take time to clean out the lint filter area more thoroughly, including checking behind and around the dryer for hidden lint buildup. Use a vacuum to clear out dust and debris. If your dryer still seems sluggish, the vent hose might need a deep clean—or even a visit from a professional. In Alameda, where the damp air can lead to moisture problems, keeping dryer vents clear is especially important to prevent mold. I also make it a habit to wipe down the exterior and check for any stray socks or clutter while I’m at it.
How Often Should You Clean the Lint Trap?
Here’s a simple rule I follow: pull out the lint trap and clear it after every single load. It only takes a few seconds, and your dryer will thank you. A more thorough, soapy wash and a vacuum around the trap area is good to do once a month or so, especially if your household does a lot of laundry.
If you have pets, you might find yourself needing to clean a bit more often—fur loves to hide in the tiniest places!
Wrapping Up: Small Step, Big Results
I get it—life is busy, and the laundry never really ends. But taking a moment for cleaning dryer lint trap can keep your home safer, save you money on energy, and even help your favorite clothes last longer. Next time you toss in a load, remember: a clean lint trap is a happy dryer, and a happy dryer makes for a smoother, safer Alameda home.
So don’t wait until you notice problems. Make cleaning your dryer lint trap a regular part of your routine, and you’ll thank yourself later. Happy laundering!
Read More: Alameda Dryer Vent Cleaning


Leave a Comment