What Tools Are Used in Arcadia Dryer Vent Cover Replacement?
If you notice lint piling up outside your home or feel a persistent musty odor near your dryer vent, it may be time to address the condition of your vent cover. Over time, these covers can crack, warp, or become blocked, making replacement essential to keep your appliance running efficiently. For homeowners in Arcadia, knowing what tools are necessary for a seamless Dryer Vent Cover Replacement can make the difference between a quick fix and recurring problems.
Why It Matters
Replacing a dryer vent cover goes beyond basic maintenance. A properly installed cover keeps pests out, prevents backdrafts, and ensures that your dryer works at peak performance. Ignoring this task can cause moisture buildup, lint blockages, and even structural damage over time. By understanding what’s involved, you ensure a safer and more energy-efficient home.
Common Problems
Homeowners often encounter issues like cracked vent hoods, stuck flaps, or vents clogged by lint and debris. Over time, exposure to the elements can warp or break plastic covers, while metal ones may rust or become loose. Common symptoms include longer drying times, unusual odors, or visible lint around the vent area. Addressing these issues early can prevent bigger headaches later.
Key Benefits
A fresh vent cover isn’t just about appearances. It improves airflow, reduces fire risks, and keeps rodents and insects at bay. Upgrading to a new cover can also lower energy consumption, as your dryer won’t have to work as hard. Other LSI keywords to consider for this process include dryer vent installation, vent hood replacement, and dryer vent repair. According to industry expert Mark Ellis of Arcadia Home Solutions:
“Using the proper tools and techniques during vent cover replacement protects your home from fire hazards and ensures that your dryer operates efficiently year-round.”
The Role of Dryer Vent Cover Replacement
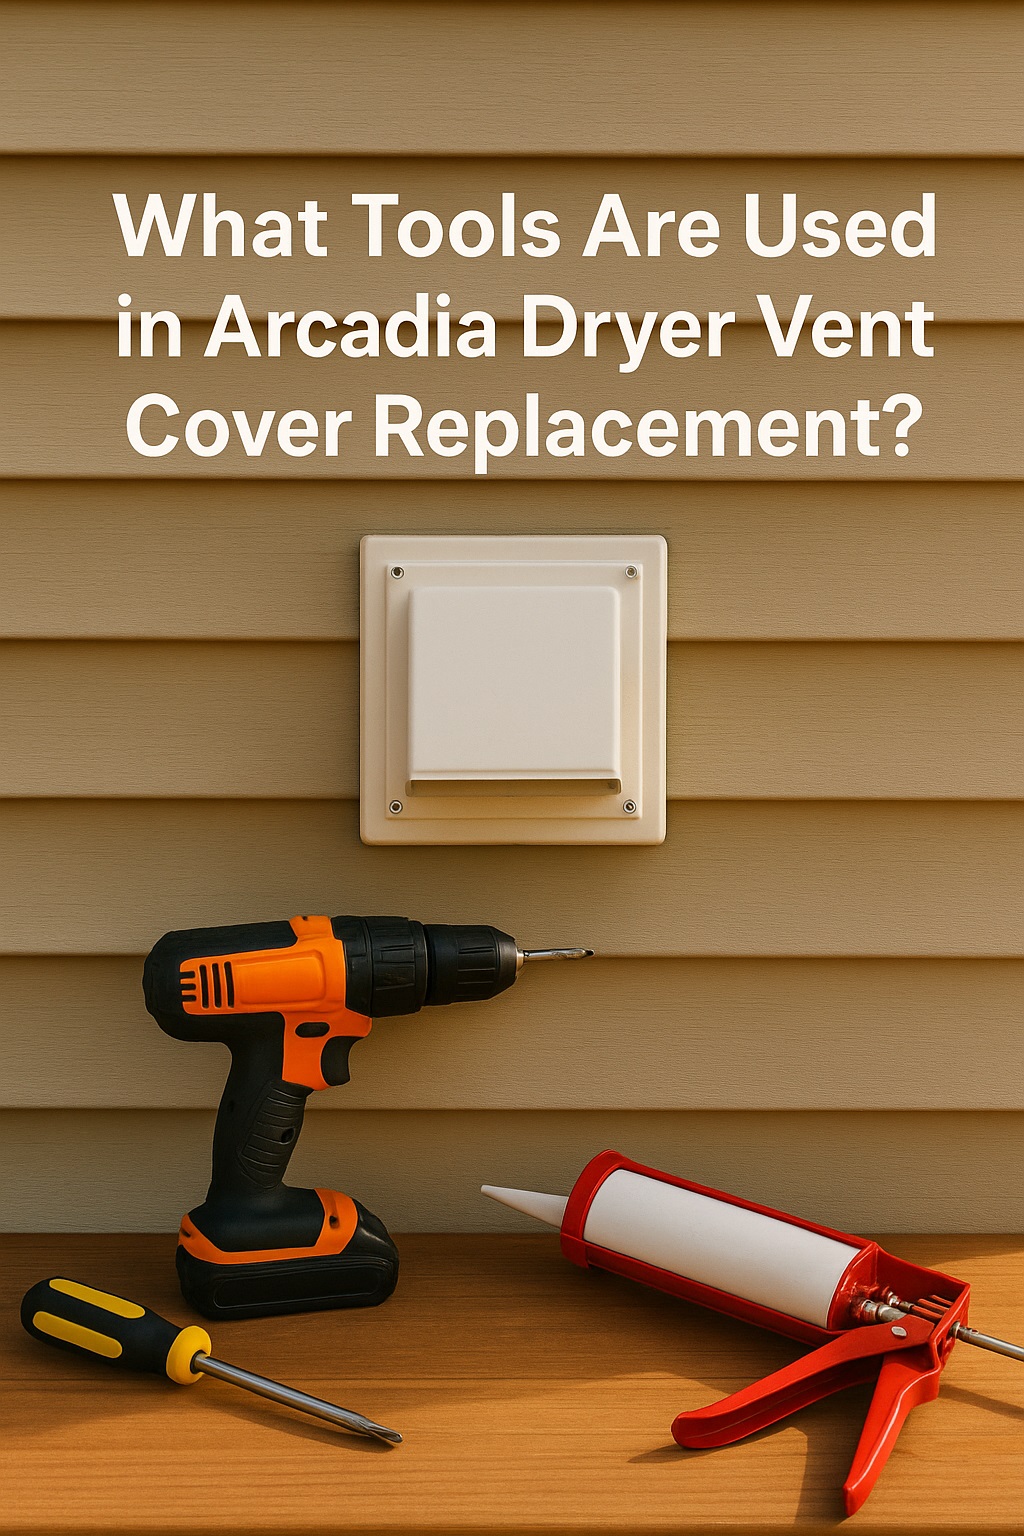
The process of replacing a dryer vent cover in Arcadia typically involves a set of essential tools. You’ll often need a screwdriver set—both flathead and Phillips—plus a cordless drill, a utility knife, and needle-nose pliers for removing old hardware. Caulk and a caulk gun seal the new cover, while a sturdy ladder is essential for reaching vents installed higher up. If you’re performing Dryer Vent Cleaning at the same time, a flexible lint brush and vacuum attachment can clear away built-up debris before installing the new cover for a comprehensive result.
Cost Breakdown
| Item | Estimated Cost |
|---|---|
| Dryer Vent Cover (standard) | $10 – $30 |
| Screwdriver Set | $8 – $20 |
| Utility Knife | $5 – $15 |
| Caulk & Caulk Gun | $7 – $18 |
| Ladder | $40 – $120 (if not already owned) |
| Professional Installation (optional) | $80 – $150 |
Key Features
When selecting a new dryer vent cover, look for models with weather-resistant materials, easy-to-operate flaps, and built-in screens for pest prevention. Some covers offer insulated backdraft protection or UV-resistant finishes for longer-lasting performance. Choose a cover compatible with your vent’s size and type for a secure fit and lasting results.
Safety
Safety should always come first during any home maintenance project. Always disconnect your dryer from its power source before beginning work. Use a stable ladder when needed and wear gloves to protect your hands from sharp edges or debris. If you encounter stubborn blockages or notice signs of water damage, consult a professional to prevent injury or further damage to your home.
Emergency Services
In cases where your dryer vent cover is broken or missing and you notice immediate signs of water intrusion, pest entry, or excessive heat buildup, emergency replacement services are available in Arcadia. Many local providers offer same-day appointments to restore safety and prevent further problems.
FAQs
Q1: How often should I replace my dryer vent cover?
A. Most covers last 5–8 years, but inspect yours annually for cracks, rust, or warping, and replace it as needed.
Q2: Can I replace a dryer vent cover myself, or should I hire a professional?
A. DIY replacement is possible with basic tools, but if your vent is difficult to access, or you notice mold or heavy lint buildup, it’s best to call in a pro.
Q3: What are the signs that my dryer vent cover needs replacing?
A. Longer drying times, visible lint around the vent, drafts, or spotting bugs and rodents near the vent indicate it’s time for a new cover.
Conclusion
Having the right tools and knowledge makes all the difference in successful Arcadia dryer vent cover replacement. This simple upgrade not only boosts your home’s safety and energy efficiency but also extends the lifespan of your dryer. Whether you tackle the job yourself or bring in a local expert, prioritizing this maintenance task keeps your household running smoothly and safely year-round. Knowing which tools are essential for Arcadia dryer vent cover replacement allows you to complete the task efficiently and safely. Investing in quality vent covers and proper maintenance not only boosts your dryer’s performance but also safeguards your home from potential hazards. Whether you handle the job yourself or call in a professional, staying proactive with vent cover care is a smart move for every homeowner.
Read More: Arcadia Dryer Vent Cleaning


Leave a Comment